Do you ever look at the amazing, flowing hair of Winx Club characters and wish you could create something similar? It's a rather common wish for many artists, especially those who enjoy digital painting. Getting that special, magical look for hair in your art can feel like a big challenge, so. Many people wonder how to capture that specific style, that certain sparkle that makes Winx hair so recognizable.
This guide is here to help you get closer to that goal, you know. We're going to talk about how you can create hair with that Winx Club couture feel using Paint Tool SAI. This program is a favorite for many artists, and it has some neat features that can really help with hair. We will cover the steps, from getting your lines down to adding those bright, shiny parts that make the hair truly pop.
We will also discuss how the DeviantArt community is a great spot for sharing your creations and finding inspiration. It's a place where artists show their work, and you can see how others approach similar styles. Learning these ways of drawing hair can really help your characters look more alive and, in a way, more magical. So, let's look at how to make some fantastic hair.
Table of Contents
- Getting Started with Paint Tool SAI for Hair Art
- Understanding the Winx Hair Style
- Laying Down the Base: Lineart and Flat Colors
- Adding Depth: Shading and Form
- Bringing the Shine: Highlights and Sparkle
- Using Brushes for Winx Hair
- The Linework Layer: A Helpful Tool
- Sharing Your Art on DeviantArt
- Frequently Asked Questions
- Final Thoughts on Creating Magical Hair
Getting Started with Paint Tool SAI for Hair Art
To begin, you will want to open Paint Tool SAI, as a matter of fact. You can start a new file or open an image you are already working on. This program is quite popular for its smooth line art and painting tools, which are really good for hair. If you do not have Paint Tool SAI yet, it's worth knowing that many artists find it a very reliable tool. I mean, it is pretty safe and works on different versions of Windows, too.
Before you even start drawing, it's good to think about your brushes. The brushes you pick can make a big difference in how your hair looks. Some brushes are great for drawing clean lines, while others are better for blending colors or adding texture. A lot of artists use modified versions of the default brushes, or even ones they found from other users. You know, experimenting with brush settings is a pretty good idea to see what works best for you. Just a little change can make things look quite different.
Having the right setup in SAI can make the whole process easier. Make sure your canvas size is good for the detail you want to put into the hair. Sometimes, a larger canvas lets you add more fine lines and soft blends. It's about setting yourself up for success before you even put down the first stroke, actually. This prepares you to create some really lovely hair, so.
Understanding the Winx Hair Style
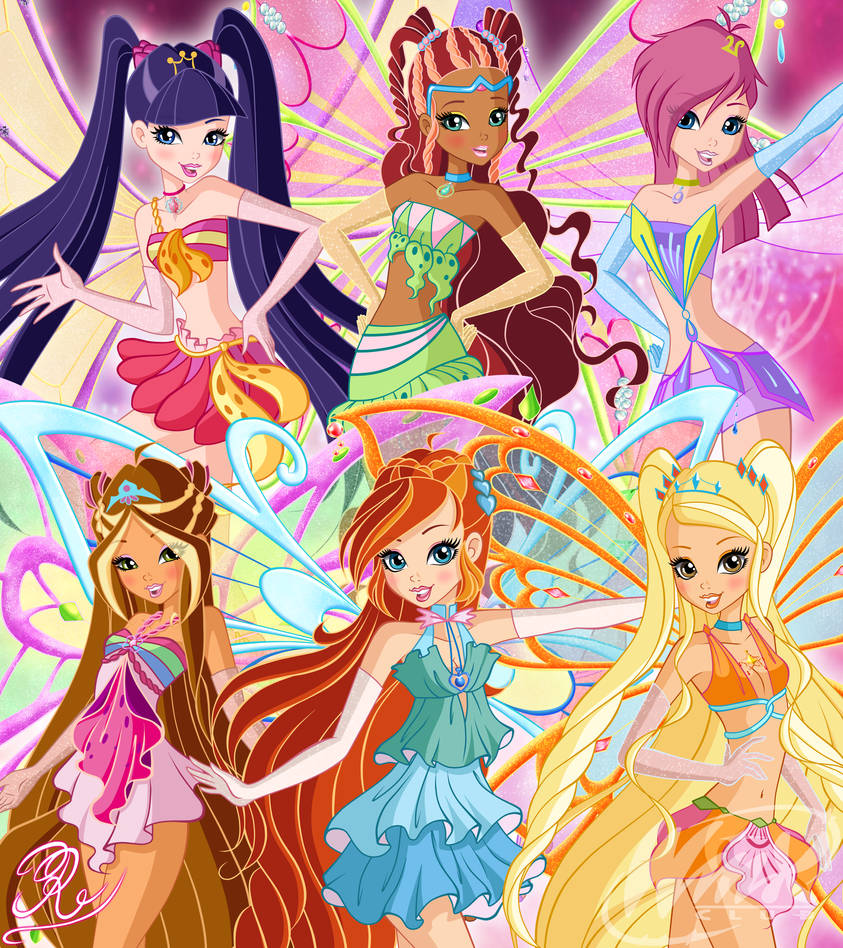
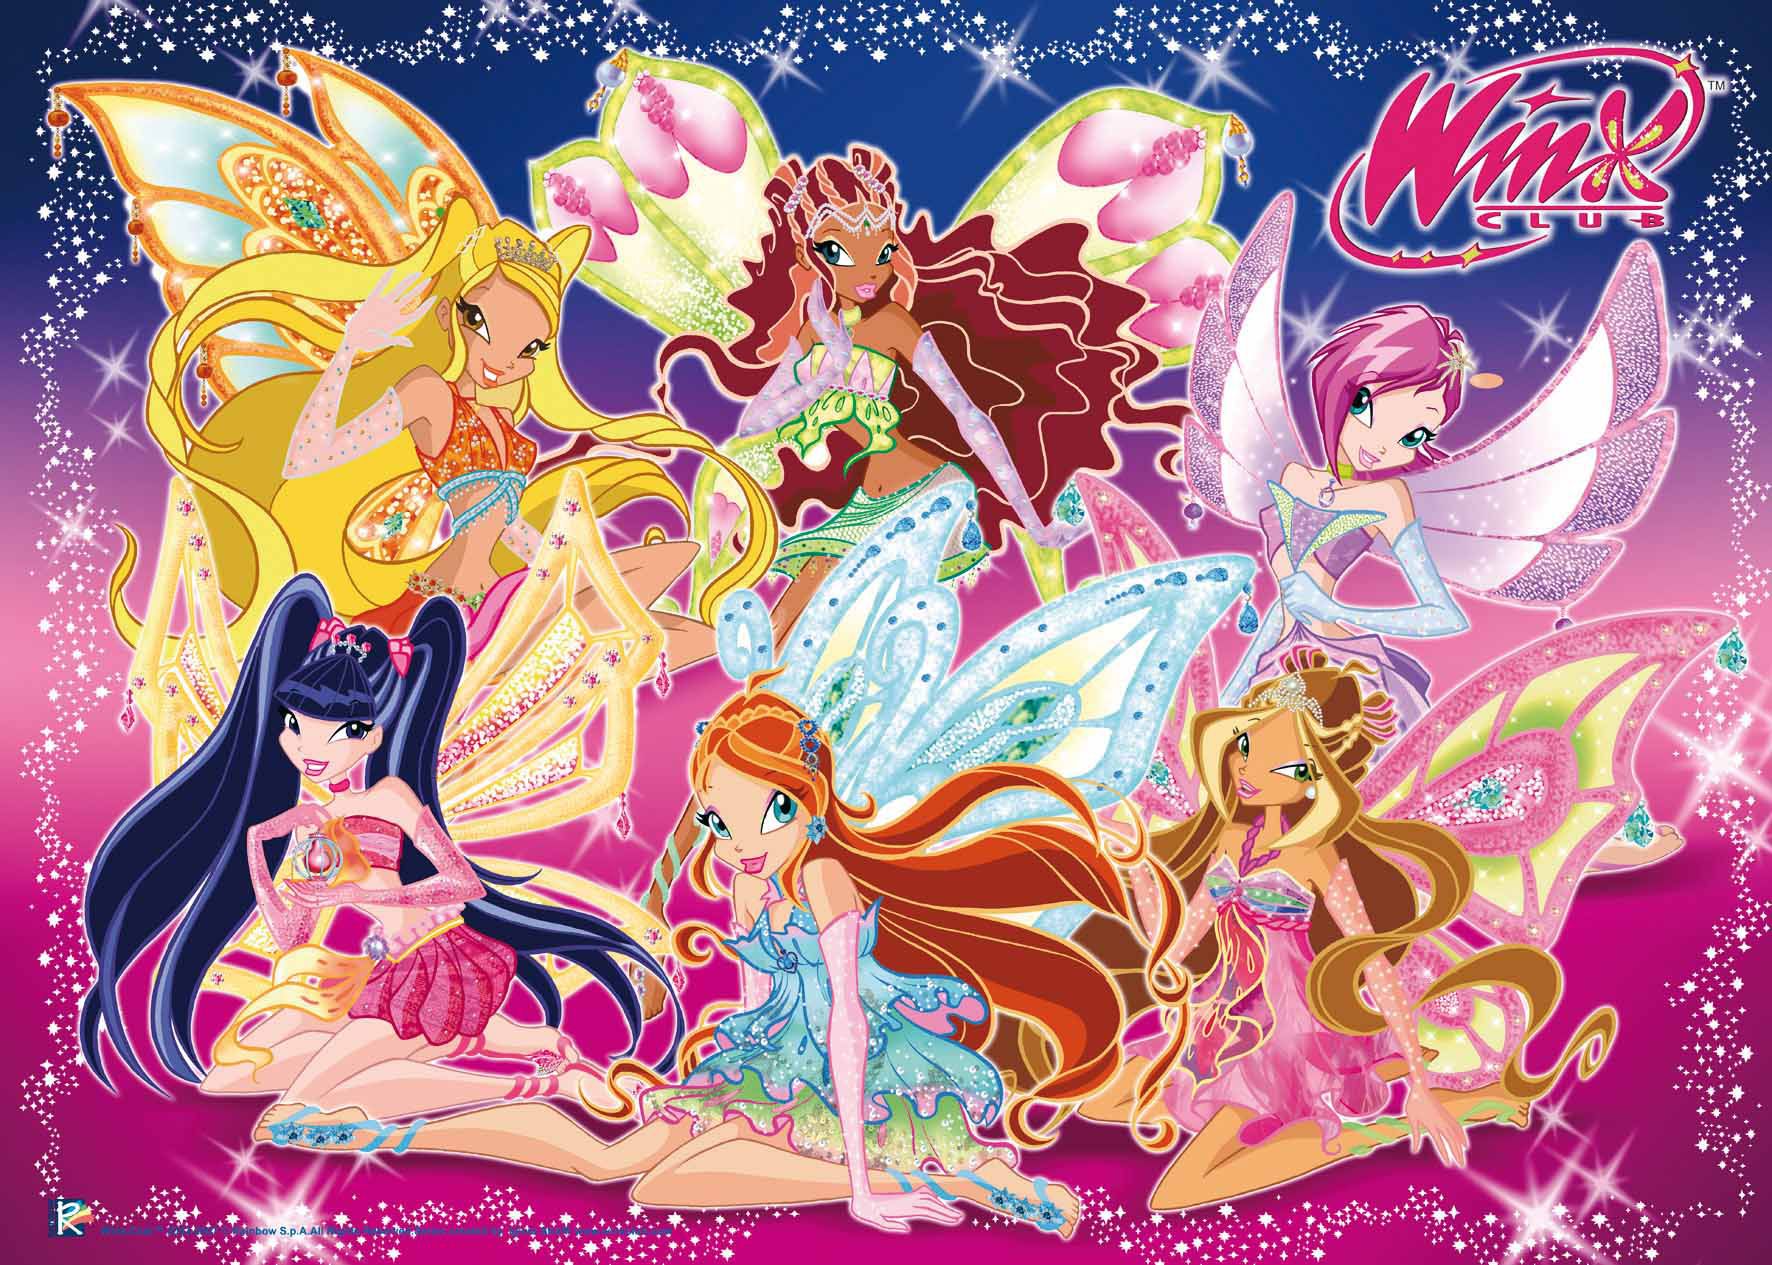
The Winx Club hair style is rather unique, isn't it? It has a very distinct look, often with lots of volume, movement, and those iconic shiny parts. When you look at it, you see a lot of flow and a certain kind of bounce. It is not just straight lines; there are often curves and swirls that give the hair a magical, almost ethereal feel. Understanding these basic ideas about the style is pretty important.
Think about how the hair usually sits on the character's head and how it moves. It often has sections that seem to float, or are very dynamic. The colors are usually bright and vibrant, too, which adds to the overall magical feeling. You will notice that the hair often has a lot of layers and different strands that create a rich texture. It's not just one solid block of color; there is a lot going on with it.
To capture this, you need to pay attention to how light might hit the hair. The way the hair catches light is a big part of the Winx look. It's about making it appear lively and full of energy, you know. This style tends to exaggerate volume and shine, which makes it fun to draw. It's a bit like drawing a flowing fabric, but with more structure and a lot more sparkle, in a way.
Laying Down the Base: Lineart and Flat Colors
The first big step is creating the lineart for the hair. This is essentially the outline of your drawing, and it's where you define the shape and flow of the hair. When you draw the lines, think about the direction the hair is going and how it might curve around the head or flow down. It's about getting those clean, clear lines that will hold your colors later. Remember, lineart is just the lines; nothing is supposed to be filled in or colored at this stage, so.
Once your lineart is looking good, you can move on to laying down the flat colors. This means picking the main color for the hair and filling it in evenly within your lines. This layer acts as the foundation for all your shading and highlights. Make sure you use a solid color that will serve as a good base for the rest of your work. It's really important to keep this layer clean and without any stray pixels outside your lines, you know.
You can use the magic wand tool or a selection tool to quickly fill in large areas. After that, you might use a regular brush to clean up any edges. This step is about getting a smooth, even base color that is ready for more detailed work. It's pretty straightforward, but it sets the stage for everything that comes next, so take your time with it, apparently.
Adding Depth: Shading and Form
After your flat colors are down, it's time to give the hair some shape and depth. This is where shading comes in. Think about where the light source is coming from and how that would affect the hair. Areas that are further away from the light, or hidden by other strands, will be darker. You want to use a color that is a bit darker than your base color for these shaded areas, you know.
You can use a soft brush for shading to create smooth transitions between colors. This helps the hair look round and full, rather than flat. Gradually build up the shadows, layer by layer, until you get the depth you want. It's like sculpting with color, giving the hair a three-dimensional feel. You might use a slightly darker shade for the deepest parts of the shadows, too.
Consider the individual strands and sections of hair. Even within a large mass of hair, there will be smaller parts that cast shadows on each other. Adding these subtle shadows makes the hair look more realistic and detailed. It's a bit of a process, but it really makes a difference in the overall look, so. This step is pretty important for making the hair feel like it has volume, apparently.
Bringing the Shine: Highlights and Sparkle
This is arguably everyone's favorite part: adding the highlights. This is where the hair truly starts to shine and get that signature Winx Club look. Highlights are the bright areas where the light hits the hair most directly. They usually appear in the middle of a section of hair, or somewhere on the curved parts that face the light. These are the bits that really make the hair look alive and magical, you know.
To create highlights, pick a color that is lighter than your base color, perhaps even a very light version of it, or even white. You can use a hard-edged brush for sharp, defined highlights, or a softer brush for a more diffused glow. It often helps to add these bright areas in concentrated spots, rather than spreading them out too much. This creates a focal point for the light, so.
For that extra Winx sparkle, you can add smaller, even brighter points of light within the main highlights. These tiny bright spots can give the hair a truly magical, almost glittery effect. It's about layering those bright colors to build up the shine. This step really brings out the couture feel of the hair, making it look vibrant and full of life, virtually. It is pretty satisfying to see the hair light up with these touches.
Using Brushes for Winx Hair
Choosing the right brushes in Paint Tool SAI is pretty important for creating Winx-style hair. While the program comes with default brushes, many artists modify them or use custom ones. You know, these brushes can help you achieve different textures and effects. For hair, you often want brushes that can create smooth lines for the outline, and then others that can blend colors softly for shading. Some brushes are also good for adding fine strands or textures, too.
When you are drawing hair, you might find that a brush with a slight texture can help make the hair look more natural, rather than completely smooth. For highlights, a brush that can create a sharp, bright line is often very useful. It's a bit like having a set of tools, where each tool does a specific job. Experimenting with the brush settings is really key here. You can change things like the size, density, and even the shape of the brush to get different results, apparently.
Many artists share their custom brushes online, and sometimes these can be a great starting point. Just remember that what works for one artist might not feel right for another, so it's about finding what feels good for you. I mean, I've had some brushes for so long I don't even remember where they came from, but they just work. So, don't be afraid to try different things and adjust settings until you find your perfect hair brushes, you know.
The Linework Layer: A Helpful Tool
The linework layer in Paint Tool SAI is a tool that many artists don't use much, or feel a bit unsure about. But it can be really helpful, especially for hair. This layer lets you draw lines that are separate from your painting layers. What's cool about it is that you can adjust these lines after you've drawn them, which is pretty handy. You can change their thickness, move them around, or even smooth them out without affecting your colors, so.
For hair, this means you can draw your initial hair outlines on the linework layer. If a line doesn't look quite right, you can easily tweak it. This is much easier than trying to erase and redraw on a regular raster layer. It gives you a lot more control and flexibility, you know. You can make sure your hair has that clean, flowing look that is so important for the Winx style.
After you're happy with your linework, you can then convert it to a raster layer or just use it as a guide for your painting. Some artists keep the linework layer separate throughout the whole process. It's a very powerful feature that can save you a lot of time and frustration, especially when you are trying to get those perfect hair strands. It's definitely worth giving it a try if you haven't before, apparently.
Sharing Your Art on DeviantArt
Once you've finished your amazing Winx Club couture hair piece, you will probably want to share it. DeviantArt is a really popular place for artists to do just that. It's a huge online community where people can upload their creations, get feedback, and connect with others who love art. It's a great spot to show off your new hair drawing skills, you know.
When you upload your art, you can add descriptions, tags, and categories. Using relevant tags like "Winx Club," "Paint Tool SAI," "hair tutorial," or "fan art" can help people find your work. You can also link back to any tutorials you followed, or mention the brushes you used. This helps other artists who might be looking for similar tips, so.
The DeviantArt community is very supportive, and you can get comments and favorites on your work. It's a good way to see what people think and to get encouragement. Many artists also find inspiration by looking at what others have created. It's a place where you can really feel like part of a bigger art world, which is pretty cool. You can even find other tutorials or resources there, too. DeviantArt is a great place to explore and connect with other artists, by the way.
Frequently Asked Questions
Here are some common questions people ask about creating hair in Paint Tool SAI, as a matter of fact.
How do I make hair look shiny in Paint Tool SAI?
To make hair look shiny, you really need to focus on highlights. Use a lighter color, sometimes even white, and apply it in concentrated areas where light would hit the hair most directly. These are often in the middle of a section or along a curve. Layering different shades of light can also help create a very strong shine, you know. Think about how real hair reflects light, and try to copy that effect with your colors.
What brushes are good for Winx Club hair in Paint Tool SAI?
For Winx Club hair, you will want a mix of brushes. A smooth pen brush is good for clean lineart. For shading and blending, a soft airbrush or a custom blend brush works well. For highlights, a brush that can create sharp, defined lines is pretty useful. Many artists modify the default brushes in SAI to get the specific effects they want. Experimenting with the brush settings like density and texture can help you find your favorites, so.
Can I use the linework layer for hair in Paint Tool SAI?
Yes, you absolutely can use the linework layer for hair in Paint Tool SAI. It's a very helpful tool for drawing clean and editable lines. You can draw your hair outlines on this layer, and then easily adjust them later without affecting your other layers. This means you can refine the shape and flow of the hair until it's just right. It gives you a lot of flexibility and can make the process of drawing hair much smoother, you know. Learn more about digital art techniques on our site, and check out this page for more Paint Tool SAI tips.
Final Thoughts on Creating Magical Hair
Creating Winx Club couture hair in Paint Tool SAI is really about understanding the style and using the tools effectively. It takes some practice, like any art skill, but it is very rewarding. You start with good lineart, add your base colors, then build up the depth with shading. The real magic happens when you add those bright, shining highlights, so.
Remember that experimenting with brushes and settings is a big part of the process. What works for one person might be different for another, and that's totally fine. The linework layer is also a pretty neat tool that can make things easier. And when you are done, sharing your work on DeviantArt is a great way to connect with other artists and get feedback, you know. Keep practicing, and your digital hair will surely start to look more and more magical. This is a journey that is pretty fun, actually, and you learn something new each time.