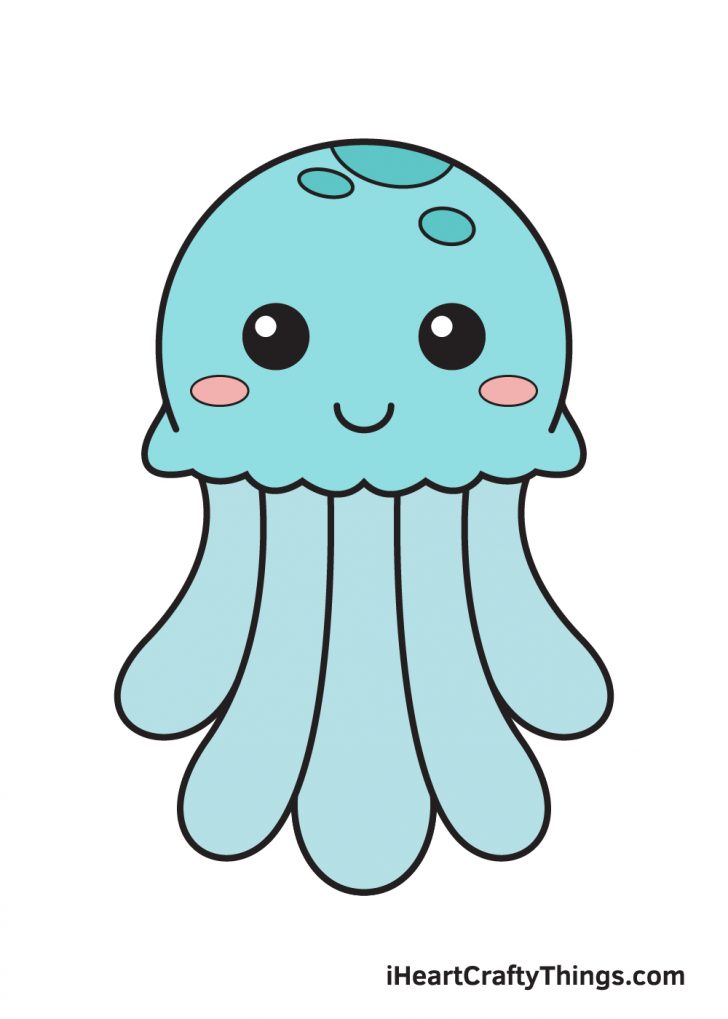
There is something truly wonderful about putting pencil to paper and watching a creation come to life, especially when that creation is something as graceful as a creature from the deep blue. It’s a chance, you know, to really let your imagination swim free, bringing a piece of the ocean into your own space. This particular kind of art, making a picture of a jellyfish, offers a delightful way to explore your own creative spirit, perhaps even surprising yourself with what you can achieve.
We find that making a picture of a jellyfish is a rather special kind of creative activity. It is a pursuit that my friend Jack and I have been enjoying a good deal, figuring out how to make these sea dwellers look quite real on paper. We are really hoping that you and any young ones you know will find as much joy as we do in making your very own versions of these fascinating beings, just following along with what we share.
This particular art lesson, while it might seem a bit more involved at first glance, is still genuinely fun for everyone who tries it. You see, a jellyfish picture offers a truly unique chance to work on how you shade things, how you make lines, and other ways of making marks with your art tools. There is, in fact, quite a lot of good learning that comes along with trying to make a picture of a jellyfish.
Table of Contents
- Why Make a Jellyfish Drawing?
- What Makes a Jellyfish Drawing Special?
- Getting Started with Your Jellyfish Drawing
- Simple Steps for Your Jellyfish Drawing
- Can Anyone Create a Jellyfish Drawing?
- Ideas for Your Next Jellyfish Drawing
- What Tools Do You Need for a Jellyfish Drawing?
- More Ways to Learn Jellyfish Drawing
Why Make a Jellyfish Drawing?
Making a picture of a jellyfish is, in a way, a truly engaging activity for anyone who enjoys putting their thoughts onto paper. These particular ocean creatures, with their flowing shapes and often see-through bodies, provide a wonderful subject for art. It is a process that feels both calming and exciting, giving you a chance to focus your mind on something creative. You might find it helps you relax, too, as you concentrate on the simple lines and curves that bring your sea creature to life.
The act of creating a jellyfish picture is not just about the finished piece; it is also about the experience of making it. There is a real sense of accomplishment when you see your efforts take shape, and it is pretty rewarding. It is a type of drawing that can truly spark a person's interest in art, especially for younger artists who are just starting out. You are, in essence, making something beautiful while also picking up some helpful skills along the way, which is a rather good combination.
What Makes a Jellyfish Drawing Special?
A picture of a jellyfish offers a rather special chance to work on several art skills at once. For instance, you get to practice how light and shadow play across a surface, making something appear round or deep, which is often called shading. This creature’s bell shape and its long, flowing parts are perfect for exploring how to make things look like they have real form. It is, you know, a bit like learning to sculpt with your pencil, adding depth and dimension to a flat piece of paper.
Beyond just making things look round, working on a jellyfish picture helps with your linework. This means how you make your lines, whether they are light and wispy or firm and clear. The delicate nature of a jellyfish means you can experiment with different kinds of lines to show movement and the softness of its body. You also get to try out various drawing approaches, figuring out what works best for you to capture the unique look of these ocean beings. It is, basically, a great way to improve how you handle your drawing tools and how you see shapes in the world.
Getting Started with Your Jellyfish Drawing
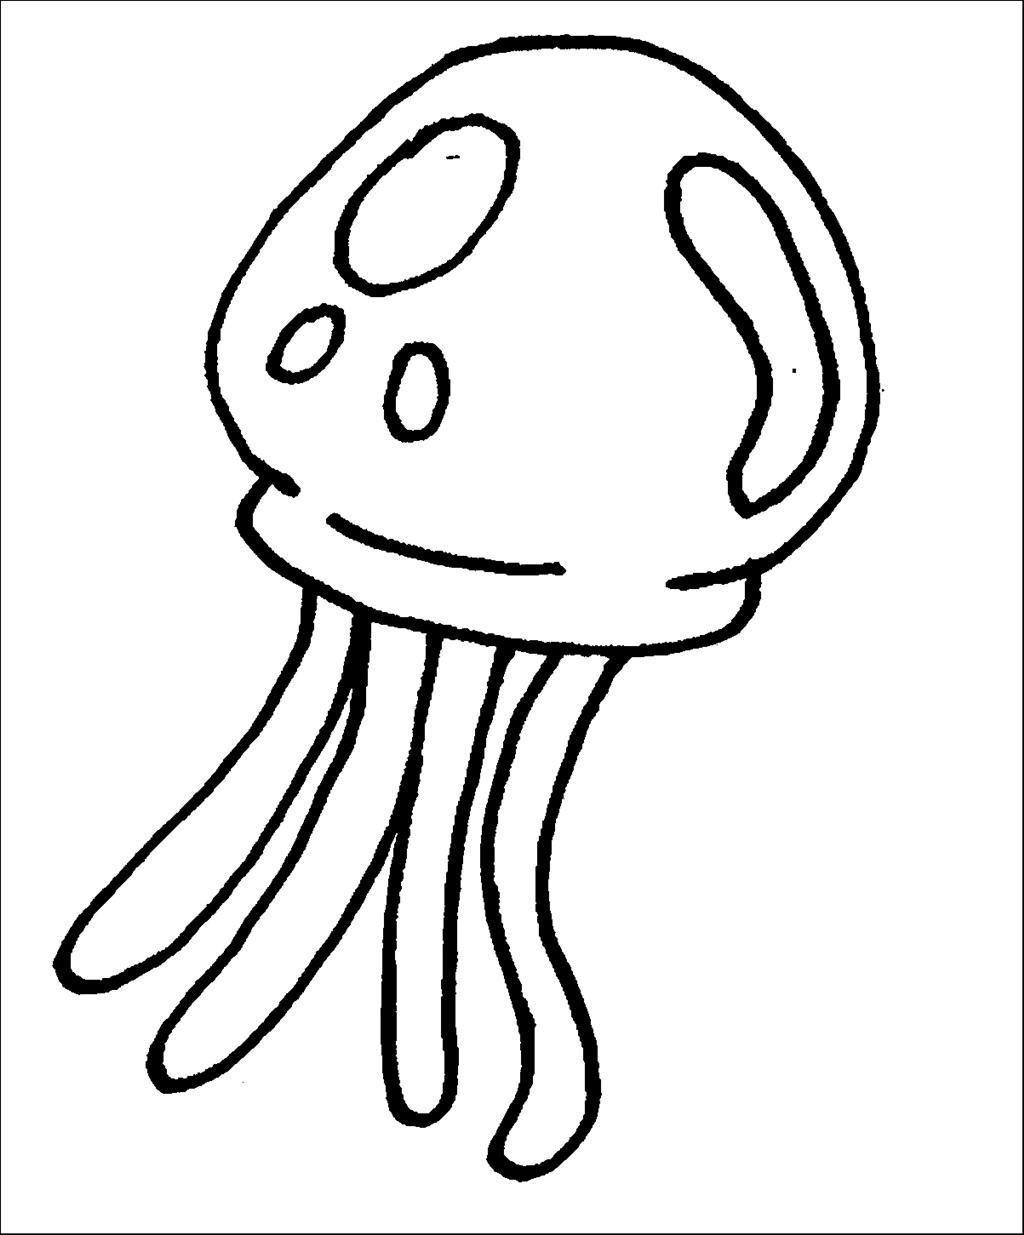
Starting your own jellyfish picture might seem like a big task, but it really is not. The secret, you see, is to begin with the most basic shapes and lines. Think of it like building something with simple blocks before adding all the fancy details. You would typically begin with a gentle curve for the top of the jellyfish’s body, perhaps like an upside-down bowl or a mushroom cap. This simple start gives you a solid base to build upon, which is quite helpful.
From that initial curved shape, you can then add more lines to form the main body, making it look full and rounded. Then, you can begin to sketch out the long, trailing parts beneath. These parts, the tentacles and oral arms, can be drawn with wavy lines that flow downwards. It is, in a way, a process of adding one simple element after another, gradually seeing your jellyfish take shape on the paper. This approach makes the whole activity feel much more approachable, even for someone who feels they are just beginning their art journey.
Simple Steps for Your Jellyfish Drawing
I am going to show you, quite clearly, every single step of the process. You will see how you can use just those simple lines and basic shapes to really build up the overall look of your jellyfish. We will start with the main body, then move onto the parts that hang down, and then maybe some of the smaller details that give it character. It is, you know, a very systematic way to approach making your picture, ensuring you feel supported at each stage.
Once you have a good grasp of the basic form, you can even try making different kinds of jellyfish or adding extra bits to your picture. Perhaps you want your jellyfish to have a slightly different shape to its bell, or maybe you want to make its trailing parts longer or more curly. There are, basically, many ways to make your jellyfish picture unique to you. We are really hoping that you and any young people with you will find much joy in making your very own jellyfish as you follow along with us, step by step.
Can Anyone Create a Jellyfish Drawing?
Absolutely, anyone can create a jellyfish picture! While the original thought might have been that this art lesson is a bit more for those with some drawing background, it is truly enjoyable for everyone, no matter their previous experience. The instructions are set up to be very easy to follow, making sure that even if you have never picked up a pencil to draw before, you will still be able to make something you are happy with. It is, you know, all about trying and having a bit of fun with it.
Learning how to make a beautiful jellyfish picture is both a fun and informative activity for young people of all ages, and grown-ups too. The steps are broken down into small, manageable parts, so it never feels overwhelming. This means that whether you are a very young artist just starting to make marks or someone who has been drawing for many years, you will find something to enjoy and learn from. It is, basically, a very welcoming creative pursuit for all skill levels.
Ideas for Your Next Jellyfish Drawing
There are, in fact, so many wonderful ideas for your next jellyfish picture. These suggestions are quite simple, rather charming, and just right for when you want to make a quick sketch. You could, for instance, make a jellyfish that looks like it is smiling, or one that has a little frown, or maybe one that just floats around looking sweet and peaceful. The possibilities for giving your jellyfish a bit of personality are quite open, which is rather fun.
Whether your jellyfish expresses a happy feeling, a thoughtful one, or just drifts along looking appealing, you are in for a lot of good times making ocean-inspired art. We have gathered a collection of 25 simple jellyfish picture ideas, complete with step-by-step outlines, things you can print out, and pages you can color in. These ideas are, truly, a great way to get started or to find new ways to make your jellyfish picture unique. They provide a good starting point for your creative efforts.
What Tools Do You Need for a Jellyfish Drawing?
To get started on your jellyfish picture, you do not need a lot of complicated art supplies. The beauty of this activity is that it can be done with very basic items you likely already have around your home or can get quite easily. We have put together a simple list of the things we used, but you should feel free to use whatever similar items you have available. It is, basically, about making art accessible to everyone, which is a good thing.
For most jellyfish pictures, you will generally need some paper, a pencil, and perhaps an eraser. If you want to add some color, crayons, colored pencils, or even markers would work well. The goal is not to have the most expensive tools, but to have things that let you make marks and express your ideas. You might also want a sharpener for your pencil, too, just to keep your lines neat. These simple tools are quite enough to create something truly lovely.
More Ways to Learn Jellyfish Drawing
To help you learn how to make a truly good-looking jellyfish picture, we have put together easy instructions and even a video demonstration. Sometimes, seeing someone else make the marks can be really helpful, you know, in understanding how to do it yourself. The video walks you through each stage, making it very clear what to do next. It is, basically, like having a personal guide right there with you as you draw.
By simply following these clear actions, you, too, can quite easily create a really good jellyfish picture. The instructions are broken down into manageable pieces, so you never feel lost or unsure of what comes next. We truly hope that you and any young people you are with will find much happiness in making your very own jellyfish as you follow along with the steps we have provided. It is, basically, a very straightforward and enjoyable way to learn something new.